

Using Multimedia with Phonegap
This is in continuation to our PhoneGap tutorial series. This tutorial teaches you how to access the various device APIs in your PhoneGap app. If...
5 min read
This is in continuation to our PhoneGap tutorial series. This tutorial teaches you how to build the plugins using PhoneGap Framework.
If you are new then you can got to our previous tutorial in this series.
PhoneGap provides several device APIs to access almost all sorts of things on a device. But when it comes to extend our requirements beyond such built-in-features or simply want to do something that is not already supported, there is a need aroused to write your own custom plugins. Just like adding a third-party plugin, we can write a little bit of native code and add our own plugin to PhoneGap as well.
In order to create such plugins, one has to be somewhat familiar with JavaScript as well as Objective-C/Java (in case of Phonegap app supporting iOS/Android environment).
Now moving on to create PhoneGap plugin for iOS development, this tutorial assumes that one is familiar with JavaScript, Objective-C, the iOS SDK, and the XCode development environment.
Writing a Plugin to save your Image to Photos Library, Documents Directory :
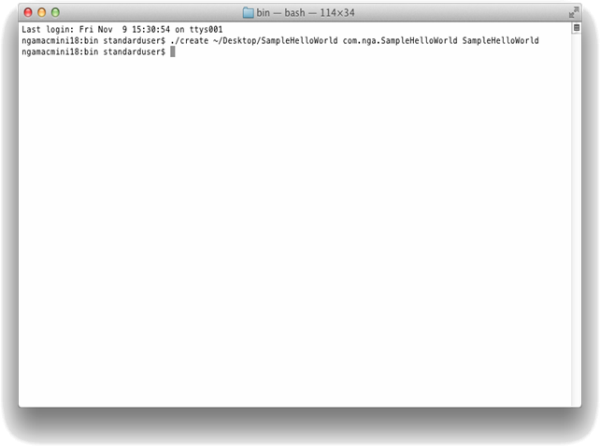
STEP 1. Create a new project using the Terminal as we have already discussed in our previous blog.
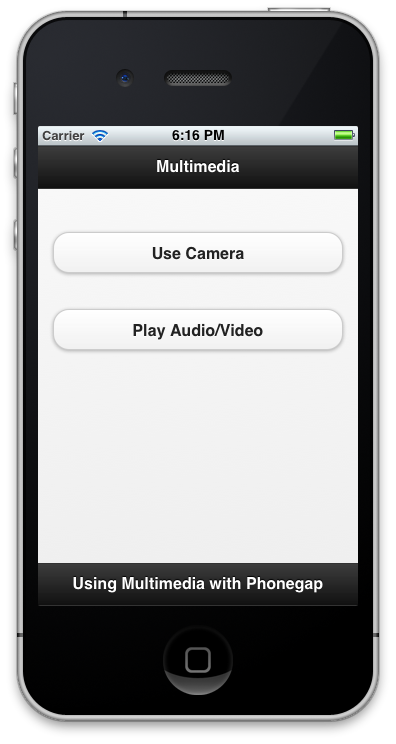
STEP 2. We need to create our initial page using HTML, CSS for how it will be presented for user interaction.
In index.html we will have an image (that is to be saved using our plugin), and two buttons : one for saving to photos library and another for saving to the documents directory. So we have it as :
<!DOCTYPE html>
<html>
<head>
<meta name="viewport" content="width=device-width, initial-scale=1.0, maximum-scale=1.0, user-scalable=no;" />
<link href="css/index.css" type="text/css" rel="stylesheet" />
<script src="cordova-2.2.0.js"></script>
<script src="js/index.js"></script>
</head>
<body onload="appInitialize.initialize();">
<div id="header">
<div id="title">Custom Plugins</div>
</div>
<h3>Here is the image we are going to save</h2>
<br>
<img id="imageToSave" src="img/flower.png">
<button onclick="appInitialize.saveToLibrary();">Save To Library</button>
<button onclick="appInitialize.saveToDocument();">Save To Document</button>
</body>
</html>
In line no. 5, we include index.css to style our page elements.
In line no. 6, we include cordova-2.2.0.js to use the functions of phonegap.
In line no. 7, we include index.js to call the methods when the user clicks the buttons.
In line no. 9, a method defined in index.js, appInitialize.initialize() is called to check if the device is ready to use.
In line no. 16, 17, we call the methods to be invoked when the buttons are clicked. These methods too are defined in our index.js file.
STEP 3. So for now we have our index.js as :
var appInitialize = {
initialize: function() {
document.addEventListener("deviceready", appInitialize.onDeviceReady, false);
},
onDeviceReady: function () {
console.log('Ready to use');
//navigator.notification.alert("Success : \r\n");
},
saveToLibrary: function () {
console.log('Ready to use saveToLibrary');
},
saveToDocument: function () {
console.log('Ready to use saveToDocument');
},
};
When onDeviceReady is called from initialize method, a log is printed on the console. You can also show an alert using the notification API of Phonegap(see line no. 9 which is currently commented out).
The two methods are invoked on button clicks : saveToLibrary, saveToDocument and print the log on the console respectively. This is just to ensure that our methods are being called.
STEP 4. Now we need to create another js object file say, MyCustomSavePlugin.js.
STEP 5. Create a new Objective-c class say, MyCustomSavePluginCommand.h, MyCustomSavePluginCommand.m
Writing code in MyCustomSavePlugin.js
MyCustomSavePlugin.install = function() {
if(!window.plugins) {
window.plugins = {};
}
window.plugins.myCustomSavePlugin = new MyCustomSavePlugin();
return window.plugins.myCustomSavePlugin;
};
function MyCustomSavePlugin() {
// Does nothing
};
function mymethod(imgId) {
var image = document.getElementById(imgId);
// Create an empty canvas element with the same dimensions as that of the image to be saved
var canvas = document.createElement("canvas");
canvas.width = image.width;
canvas.height = image.height;
// Copy the image contents to the canvas
var ctx = canvas.getContext("2d");
ctx.drawImage(image, 0, 0);
// Get the data-URL formatted image from the canvas
var dataURL = canvas.toDataURL().replace(/data:image\/png;base64,/,'');
return [dataURL, image.width, image.height];
};
MyCustomSavePlugin.prototype.saveToLibrary = function(successCallback, failureCallback, imgId) {
// successCallback required
if (typeof successCallback != "function") {
console.log("MyCustomSavePlugin Error: successCallback is not a function");
return;
}
if (typeof failureCallback != "function") {
console.log("MyCustomSavePlugin Error: failureCallback is not a function");
return;
}
var data = mymethod(imgId);
cordova.exec(successCallback, failureCallback, "MyCustomSavePluginCommand","saveToLibraryMethod",[data[0], data[1], data[2]]);
};
MyCustomSavePlugin.prototype.saveToDocuments = function(successCallback, failureCallback, imgId) {
// successCallback required
if (typeof successCallback != "function") {
console.log("MyCustomSavePlugin Error: successCallback is not a function");
return;
}
if (typeof failureCallback != "function") {
console.log("MyCustomSavePlugin Error: failureCallback is not a function");
return;
}
var data = mymethod(imgId);
cordova.exec(successCallback, failureCallback, "MyCustomSavePluginCommand","saveToDocumentsMethod",[data[0]]);
};
In line no. 1, Add a class method to the object to “install” the object at runtime which will instantiate the object and make it accessible via window.plugins.
In line no. 9, Create a new JavaScript Object class.
In line no. 13, Get the data-URL formatted image (from img tag in index.html) using the canvas.
In line no. 27, Method call to save image to library.
In line no. 41, Method call to save image to document directory.
MyCustomSavePluginCommand.h
#import <Cordova/CDVPlugin.h>
@interface MyCustomSavePluginCommand : CDVPlugin
@end
MyCustomSavePluginCommand.m
#import "MyCustomSavePluginCommand.h"
#import <Cordova/NSData+Base64.h>
@implementation MyCustomSavePluginCommand
- (void)saveToLibraryMethod:(CDVInvokedUrlCommand*)command{
CDVPluginResult* pluginResult = nil;
NSString *myarg = [command.arguments objectAtIndex:0];
NSString *myarg1 = [command.arguments objectAtIndex:1];
NSString *myarg2 = [command.arguments objectAtIndex:2];
int width = [myarg1 integerValue];
int height = [myarg2 integerValue];
if (myarg != nil) {
pluginResult = [CDVPluginResult resultWithStatus:CDVCommandStatus_OK];
} else {
pluginResult = [CDVPluginResult resultWithStatus:CDVCommandStatus_ERROR messageAsString:@"Arg was null"];
}
NSData* imageData = [NSData dataFromBase64String:myarg];
UIImage* image = [[UIImage alloc] initWithData:imageData];
CGRect rect = CGRectMake(0, 0, width, height);
UIGraphicsBeginImageContext(rect.size);
[image drawInRect:rect];
UIImage *result = UIGraphicsGetImageFromCurrentImageContext();
UIGraphicsEndImageContext();
UIImageWriteToSavedPhotosAlbum(result, self, @selector(image:didFinishSavingWithError:contextInfo:), nil);
[self.commandDelegate sendPluginResult:pluginResult callbackId:command.callbackId];
}
- (void)saveToDocumentsMethod:(CDVInvokedUrlCommand*)command
{
CDVPluginResult* pluginResult = nil;
NSString* myarg = [command.arguments objectAtIndex:0];
if (myarg != nil) {
pluginResult = [CDVPluginResult resultWithStatus:CDVCommandStatus_OK];
} else {
pluginResult = [CDVPluginResult resultWithStatus:CDVCommandStatus_ERROR messageAsString:@"Arg was null"];
}
NSArray *paths = NSSearchPathForDirectoriesInDomains
(NSDocumentDirectory, NSUserDomainMask, YES);
NSString *documentsDirectory = [paths objectAtIndex:0];
//make a file name to write the data to using the documents directory:
NSString *fileName = [NSString stringWithFormat:@"%@/image.png",
documentsDirectory];
NSData* imageData = [NSData dataFromBase64String:myarg];
BOOL saved = [imageData writeToFile:fileName atomically:YES]; //Write the file
if (saved) {
UIAlertView* alert = [[UIAlertView alloc]initWithTitle:@"Saved" message:@"Image saved successfully." delegate:nil cancelButtonTitle:@"OK" otherButtonTitles:nil];
[alert show];
[alert release];
}
else {
UIAlertView* alert = [[UIAlertView alloc]initWithTitle:@"Error" message:@"Image could not be saved." delegate:nil cancelButtonTitle:@"OK" otherButtonTitles:nil];
[alert show];
[alert release];
}
[self.commandDelegate sendPluginResult:pluginResult callbackId:command.callbackId];
}
- (void)image:(UIImage *)image didFinishSavingWithError:(NSError *)error contextInfo:(void *)contextInfo
{
CDVPluginResult* pluginResult = nil;
if (error != NULL) // Was there an error?
{
// Show error message...
NSLog(@"ERROR: %@",error);
pluginResult = [CDVPluginResult resultWithStatus:CDVCommandStatus_ERROR messageAsString:@"Arg was null"];
}
else // No errors
{
// Show message image successfully saved
NSLog(@"IMAGE SAVED!");
pluginResult = [CDVPluginResult resultWithStatus:CDVCommandStatus_OK];
UIAlertView* alert = [[UIAlertView alloc]initWithTitle:@"Saved" message:@"Image saved successfully." delegate:nil cancelButtonTitle:@"OK" otherButtonTitles:nil];
[alert show];
[alert release];
}
}
@end
STEP 6. In index.js file, we have our plugin to be automatically “installed” when device is ready. For this, we have to call a method in onDeviceReady function ,
cordova.addConstructor(MyCustomSavePlugin.install);
STEP 7. And to call the plugin methods, we have to call those methods defined in MyCustomSavePlugin.js
Now index.js would finally look as :
var appInitialize = {
initialize: function() {
document.addEventListener("deviceready", appInitialize.onDeviceReady, false);
},
onDeviceReady: function () {
console.log('Ready to use');
//navigator.notification.alert("Success : \r\n");
cordova.addConstructor(MyCustomSavePlugin.install);
},
saveToLibrary: function () {
console.log('Ready to use saveToLibrary');
var myCustomSavePlugin = window.plugins.myCustomSavePlugin;
myCustomSavePlugin.saveToLibrary(
function(msg){
//alert('msg');
},
function(err){
//alert('error');
},
'imageToSave'
);
},
saveToDocument: function () {
console.log('Ready to use saveToDocument');
var myCustomSavePlugin = window.plugins.myCustomSavePlugin;
myCustomSavePlugin.saveToDocuments(function(msg){
//alert('msg');
},
function(err){
//alert('error');
},
'imageToSave'
);
},
};
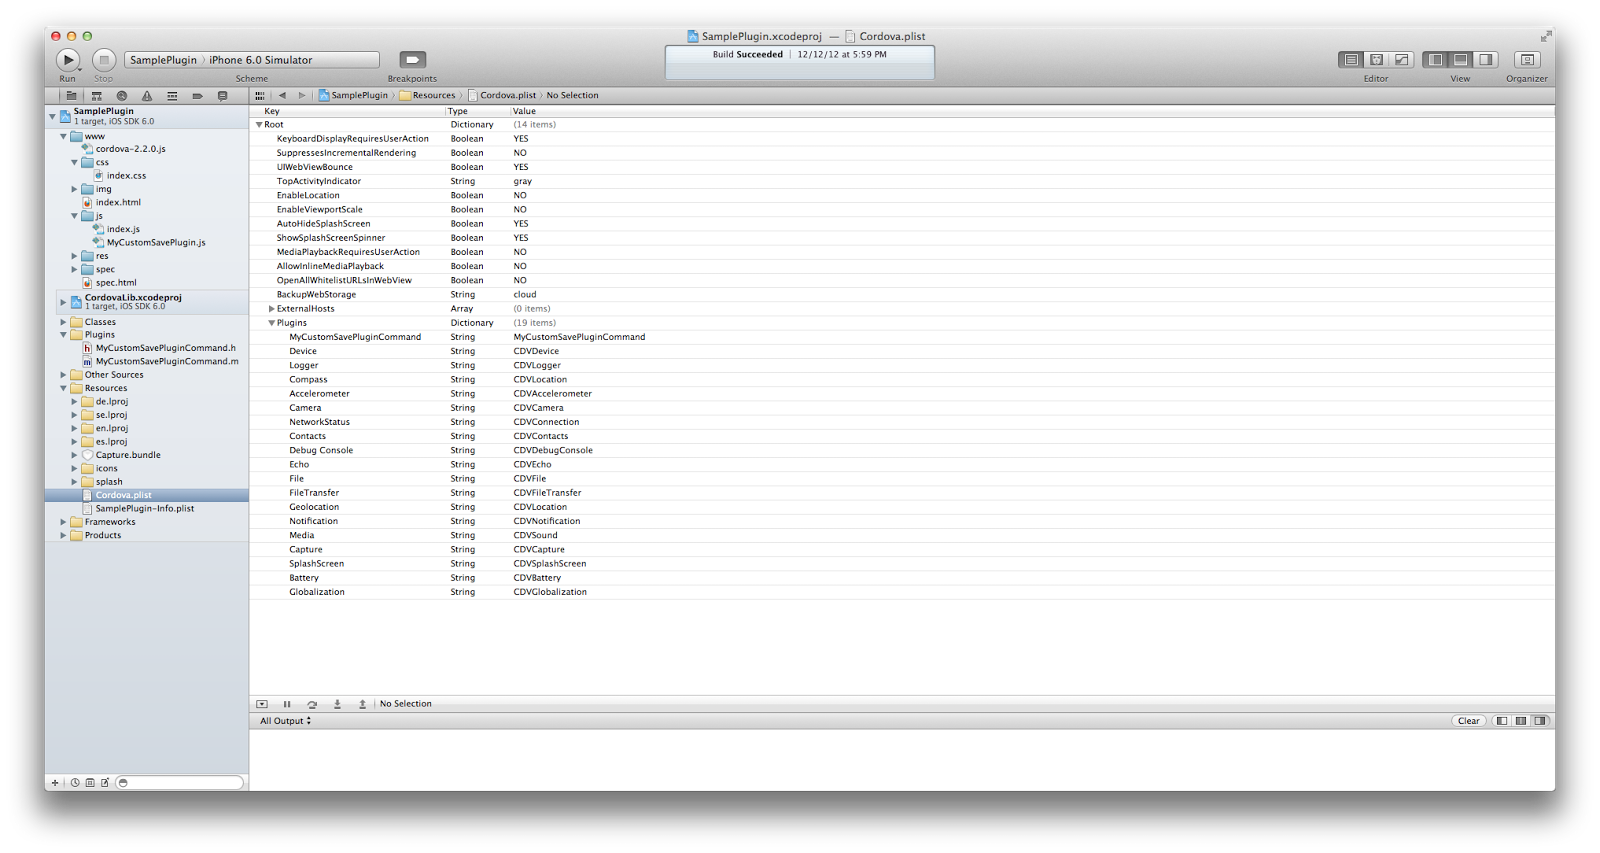
STEP 8. In cordova.plist file in your Resources, add an entry in the Plugins key
Key: MyCustomSavePluginCommand
Value: MyCustomSavePluginCommand
This step is very essential for adding any customized plugin to your Phonegap project otherwise cordova will not recognize our plugin.
NOTE : The plugin must be added to Plugins key (a Dictionary) of the Cordova.plist file in your Cordova-iOS application's project folder.
<key>service_name</key>
<string>PluginClassName</string>
The key service_name should match what you use in the JavaScript exec call, and the value will be the name of the Objective-C class of the plugin. Without this added, the plugin may compile but will not be reachable by Cordova.
STEP 9. Run the app. We have created a simple custom Phonegap plugin for iOS.
NOTE : This tutorial has been developed by using Phonegap 2.2.0 version. For more information regarding this you can visit the official site of Phonegap.
This is in continuation to our PhoneGap tutorial series. This tutorial teaches you how to access the various device APIs in your PhoneGap app. If...
PhoneGap is an open-source framework for quickly building cross-platform mobile apps using HTML and JS. It is used for building something called...
1 min read
Corona SDK is a software development kit that lets developers create graphic cross-platform apps (for iOS and Android) using Lua on top of...