

5 min read
This is in continuation to our PhoneGap tutorial series. This tutorial teaches you how to access the various device APIs in your PhoneGap app. If you are new to PhoneGap, you might want to look at our introductory tutorial on building a simple app with PhoneGap.
Device APIs
Phonegap provides us to access to use several device APIs easily. This way we can develop complex apps using the device's capabilities, while maintaining the ease of a cross-platform app. The device capabilities we have access to include
1. Accelerometer
Allows the user to capture device’s motion in x, y, z direction.
2. Camera
Provides access to the device's default camera application to capture photo/video and access the photo library.
3. Capture
Provides access to the audio, image, and video capture capabilities of the device using device's media capture applications.
4. Compass
Allows obtaining the direction that the device is pointing to.
5. Connection
Access to the device's cellular and wifi connection to quickly check the network state, and cellular network information, based on which the app can behave differently.
6. Contacts
Access to the in-built contact app.
7. Device
Describes the device's hardware and software. This API gathers device-specific information.
8. Events
Meant to handle Cordova lifecycle events. It allows the user to hook into native events through JavaScript (like app launch).
9. File
Allows the user to hook into native file system through JavaScript to read, write and navigate file system hierarchies.
10. Geolocation
Gives access to the device's GPS sensor. We can make our application location aware using this library.
11. Globalization
Obtains information and performs operations specific to the user's locale and timezone.
12. Media
Ability to record and play back audio files on a device.
13. Notification
Visual, audible, and tactile device notifications.
14. Splashscreen
Enables to show and hide the application’ s splash screen.
15.Storage
Access to the devices native storage options.
Creating a Sample Application
In this tutorial of PhoneGap, we are going to develop an application which will be using two device APIs : Camera and Media.
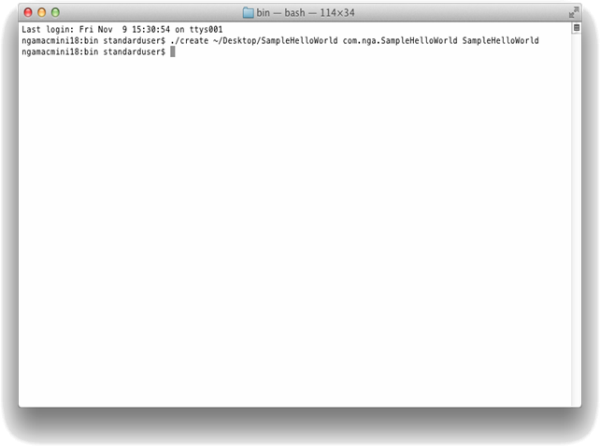
Step 1. Create a New Project
-
Launch Terminal.app
-
Drag the bin folder (located in the permanent folder location of Cordova, from the "Install CordovaLib" section above) to the Terminal.app icon in your Dock, it should launch a new Terminal window
-
Type in ./create <project_folder_path> <package_name> <project_name> then press "Enter"
-
Locate your new project folder that you just created
-
Launch the .xcodeproj file in the folder
Step 2. Writing Code
For designing the app UI we are using the JQuery and JQueryMobile framework in this app. More information about using JQueryMobile and the downloads required can be taken from its official site: http://jquerymobile.com/demos/1.2.0/
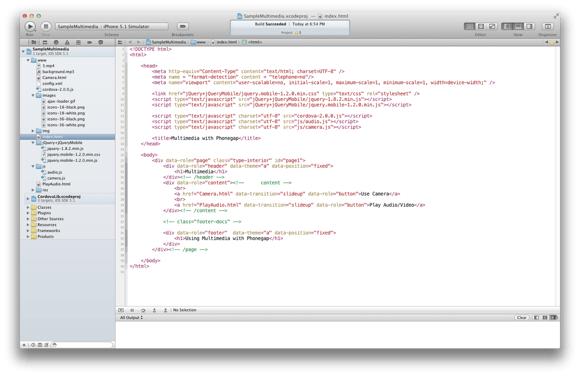
In index.html -->
Using JQueryMobile & JQuery, a page with two buttons is created as follows :
<!DOCTYPE html>
<html>
<head>
<meta http-equiv="Content-Type" content="text/html; charset=UTF-8" />
<meta name = "format-detection" content = "telephone=no"/>
<meta name="viewport" content="user-scalable=no, initial-scale=1, maximum-scale=1, minimum-scale=1, width=device-width;" />
<link href="jQuery+jQueryMobile/jquery.mobile-1.2.0.min.css" type="text/css" rel="stylesheet" />
<script type="text/javascript" src="jQuery+jQueryMobile/jquery-1.8.2.min.js"></script>
<script type="text/javascript" src="jQuery+jQueryMobile/jquery.mobile-1.2.0.min.js"></script>
<script type="text/javascript" charset="utf-8" src="cordova-2.0.0.js"></script>
<title>Multimedia with Phonegap</title>
</head>
<body>
<div data-role="page" class="type-interior" id="page1">
<div data-role="header" data-theme="a" data-position="fixed">
<h1>Multimedia</h1>
</div><!-- /header -->
<div data-role="content"><!-- content -->
<br>
<a href="Camera.html" data-transition="slideup" data-role="button">Use Camera</a>
<br>
<a href="PlayAudio.html" data-transition="slideup" data-role="button">Play Audio/Video</a>
</div><!-- /content -->
<!-- class="footer-docs" -->
<div data-role="footer" data-theme="a" data-position="fixed">
<h1>Using Multimedia with Phonegap</h1>
</div>
</div><!-- /page -->
</body>
</html>
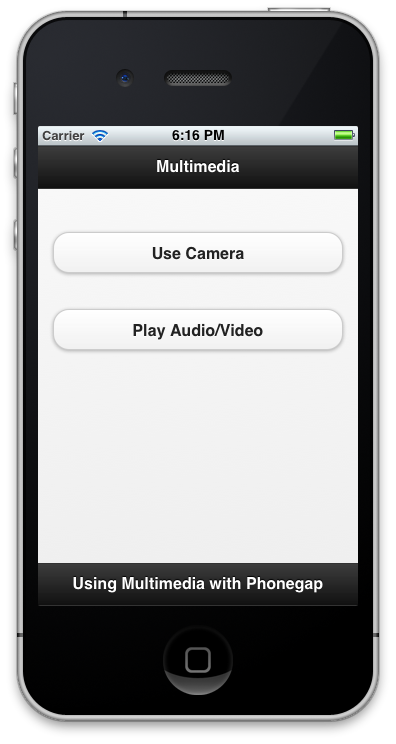
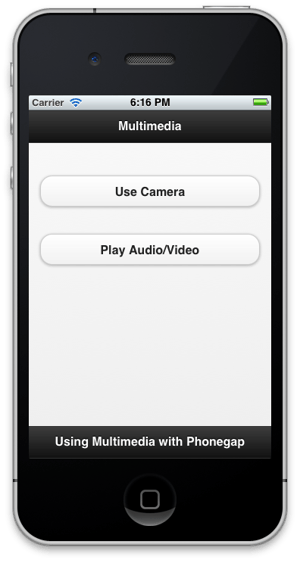
The page will look like :
Please note here that we have to download the JQuery & JQueryMobile scripts, css files to make them work.
We have to create two more HTML files which are to be displayed when the buttons on this page are clicked. Add two files Camera.html and PlayAudio.html with the following code :
In Camera.html -->
<!DOCTYPE HTML>
<html>
<head>
<title>Camera</title>
</head>
<body>
<div data-role="page" data-add-back-btn="true" id="page-camera">
<div data-role="header" data-position="fixed" data-theme="a">
<h1>Camera</h1>
</div>
<div data-role="content"><!-- content -->
<h4>Device's Camera</h4>
<button onclick="capturePhoto();">Capture Photo</button> <br>
<button onclick="capturePhotoEdit();">Capture Editable Photo</button> <br>
<button onclick="getPhoto(pictureSource.PHOTOLIBRARY);">From Photo Library</button><br>
<button onclick="getPhoto(pictureSource.SAVEDPHOTOALBUM);">From Photo Album</button><br>
<hr>
<div id="picture">
<center><img style="display:none;width:60px;height:60px;" id="smallImage" src="" /></center>
<hr>
<center><img style="display:none;" id="largeImage" src="" /></center>
</div>
</div><!-- content -->
<div data-role="footer" data-theme="a" data-position="fixed">
<h1>Using Camera with Phonegap</h1>
</div>
</div>
</body>
</html>
In PlayAudio.html →
<!DOCTYPE HTML>
<html>
<head>
<title>Play Audio</title>
</head>
<body>
<div data-role="page" data-add-back-btn="true" id="page-audio">
<div data-role="header" data-position="fixed" data-theme="a">
<h1>Audio/Video</h1>
</div>
<div data-role="content">
<h4><U>Play Your Video File</U></h4>
<video controls="controls">
<source src="3.mp4" type="video/mp4" />
</video>
<h4><U>Play Your Audio File</U></h4>
<div data-role="button" id="playaudio" data-theme="e">Play</div>
<div data-role="button" id="pauseaudio" data-theme="e">Pause</div>
<div data-role="button" id="stopaudio" data-theme="e">Stop</div>
<br>
<div class="ui-grid-a">
<div class="ui-block-a"> Current: <span id="audio_position">0 sec</span></div>
<div class="ui-block-b">Total: <span id=media_dur>0</span> sec</div>
</div>
</div>
<div data-role="footer" data-theme="a" data-position="fixed">
<h1>Playing Audio/Video with Phonegap</h1>
</div>
</div>
</body>
</html>
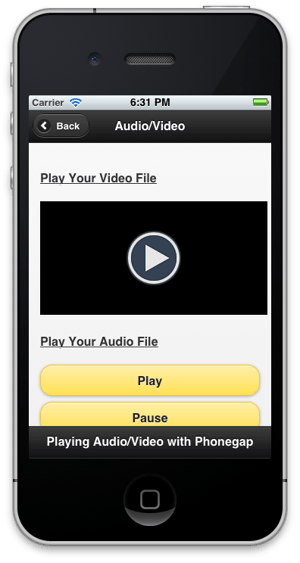
The pages displayed on the button click will be like :

Now for camera page we have 4 buttons: capture photo, capture editable photo, from photos library, from photos album, clicking on these will result into calling the methods from Javascript camera.js. Create the file and write the following :
In camera.js -->
var pictureSource; // picture source
var destinationType; // sets the format of returned value
var imageurl;
$('#page-camera').live('pageinit',function(){
pictureSource=navigator.camera.PictureSourceType;
destinationType=navigator.camera.DestinationType;
var pictureDiv = document.getElementById('picture');
// hide image elements
pictureDiv.style.display = 'none';
});
// Called when a photo is successfully retrieved
function onPhotoDataSuccess(imageData) {
// Uncomment to view the base64 encoded image data
// console.log(imageData);
var pictureDiv = document.getElementById('picture');
// hide image elements
pictureDiv.style.display = 'block';
// Get image handle
var smallImage = document.getElementById('smallImage');
// Unhide image elements
smallImage.style.display = 'block';
// Show the captured photo
// The inline CSS rules are used to resize the image
smallImage.src = "data:image/jpeg;base64," + imageData;
}
// Called when a photo is successfully retrieved
function onPhotoURISuccess(imageURI) {
// Uncomment to view the image file URI
console.log(imageURI);
var pictureDiv = document.getElementById('picture');
// hide image elements
pictureDiv.style.display = 'block';
// Get image handle
var largeImage = document.getElementById('largeImage');
// Unhide image elements
largeImage.style.display = 'block';
// Show the captured photo
// The inline CSS rules are used to resize the image
largeImage.src = imageURI;
//small image
var smallImage = document.getElementById('smallImage');
// Unhide image elements
smallImage.style.display = 'block';
// Show the captured photo
// The inline CSS rules are used to resize the image
smallImage.src = imageURI;
imageurl = imageURI;
}
// A button will call this function
function capturePhoto() {
// Take picture using device camera and retrieve image as base64-encoded string
navigator.camera.getPicture(onPhotoDataSuccess, onFail, { quality: 50, saveToPhotoAlbum:true, });
}
// A button will call this function
function capturePhotoEdit() {
// Take picture using device camera, allow edit, and retrieve image as base64-encoded string
navigator.camera.getPicture(onPhotoDataSuccess, onFail, { quality: 20, allowEdit: true });
}
// A button will call this function
function getPhoto(source) {
//alert('getPhoto: ');
// Retrieve image file location from specified source
navigator.camera.getPicture(onPhotoURISuccess, onFail, { quality: 50,
destinationType: destinationType.FILE_URI,
sourceType: source });
}
// Called if something bad happens.
function onFail(message) {
alert('Failed because: ' + message);
}
Now for audioVideo page we have will use the <video> tag in html and for playing, pause, stop functions of audio we have 3 buttons and clicking on these will result into calling the methods from Javascript audio.js. Create the file and write the following :
In audio.js -->
// The Audio player
var my_media = null;
var mediaTimer = null;
// duration of media (song)
var dur = -1;
// need to know when paused or not
var is_paused = false;
//Set audio position on page
function setAudioPosition(position) {
$("#audio_position").html(position + " sec");
}
//onSuccess Callback
function onSuccess() {
setAudioPosition(dur);
clearInterval(mediaTimer);
mediaTimer = null;
my_media = null;
is_paused = false;
dur = -1;
}
//onError Callback
function onError(error) {
alert('code: ' + error.code + '\n' +
'message: ' + error.message + '\n');
clearInterval(mediaTimer);
mediaTimer = null;
my_media = null;
is_paused = false;
setAudioPosition("0");
}
function playAudio(src) {
if (my_media === null) {
// ui niceties
$("#media_dur").html("0");
$("#audio_position").html("Loading...");
// Create Media object from src
my_media = new Media(src, onSuccess, onError);
// Play audio
//alert('Playing Audio');
my_media.play();
} else {
if (is_paused) {
// to resume where paused in song: call .play()
is_paused = false;
my_media.play();
}
}
// Update my_media position every second
if (mediaTimer === null) {
mediaTimer = setInterval(function() {
my_media.getCurrentPosition(
// success callback
function(position) {
if (position > -1) {
setAudioPosition(Math.round(position));
// getDuration() can take a few seconds so keep trying
// this could be done a better way, no callback for it
if (dur <= 0) {
dur = my_media.getDuration();
if (dur > 0) {
dur = Math.round(dur);
$("#media_dur").html(dur);
}
}
}
},
// error callback
function(e) {
alert("Error getting pos=" + e);
setAudioPosition("Error: " + e);
}
);
}, 1000);
}
}
//Pause audio
function pauseAudio() {
if (is_paused) return;
if (my_media) {
is_paused = true;
my_media.pause();
}
}
//Stop audio
function stopAudio() {
if (my_media) {
// A successful .stop() will call .release()
my_media.stop();
my_media = null;
}
if (mediaTimer) {
clearInterval(mediaTimer);
mediaTimer = null;
}
is_paused = false;
dur = 0;
}
$('#page-audio').live('pageinit',function(){
$("#playaudio").live('tap', function() {
// Note: two ways to access media file: web and local file
//var src = 'http://audio.ibeat.org/content/p1rj1s/p1rj1s_-_rockGuitar.mp3';
// local (on device): copy file to project's /assets folder:
var src = './background.mp3';
playAudio(src);
});
$("#pauseaudio").live('tap', function() {
pauseAudio();
});
$("#stopaudio").live('tap', function() {
stopAudio();
});
});
Please note here that we have two resources for playing audio - ‘background.mp3’ and video - ‘3.mp4’. Add them in the ‘www’ folder and give the corresponding path when accessed respectively.
Now for all the scripts to make them work we have to call them in our ‘index.html’. So add the following in the index.html file :
<link href="jQuery+jQueryMobile/jquery.mobile-1.2.0.min.css" type="text/css" rel="stylesheet" />
<script type="text/javascript" src="jQuery+jQueryMobile/jquery-1.8.2.min.js"></script>
<script type="text/javascript" src="jQuery+jQueryMobile/jquery.mobile-1.2.0.min.js"></script>
<script type="text/javascript" charset="utf-8" src="cordova-2.0.0.js"></script>
<script type="text/javascript" charset="utf-8" src="js/audio.js"></script>
<script type="text/javascript" charset="utf-8" src="js/camera.js"></script>
Our final index.html would look like :
<!DOCTYPE html>
<html>
<head>
<meta http-equiv="Content-Type" content="text/html; charset=UTF-8" />
<meta name = "format-detection" content = "telephone=no"/>
<meta name="viewport" content="user-scalable=no, initial-scale=1, maximum-scale=1, minimum-scale=1, width=device-width;" />
<link href="jQuery+jQueryMobile/jquery.mobile-1.2.0.min.css" type="text/css" rel="stylesheet" />
<script type="text/javascript" src="jQuery+jQueryMobile/jquery-1.8.2.min.js"></script>
<script type="text/javascript" src="jQuery+jQueryMobile/jquery.mobile-1.2.0.min.js"></script>
<script type="text/javascript" charset="utf-8" src="cordova-2.0.0.js"></script>
<script type="text/javascript" charset="utf-8" src="js/audio.js"></script>
<script type="text/javascript" charset="utf-8" src="js/camera.js"></script>
<title>Multimedia with Phonegap</title>
</head>
<body>
<div data-role="page" class="type-interior" id="page1">
<div data-role="header" data-theme="a" data-position="fixed">
<h1>Multimedia</h1>
</div><!-- /header -->
<div data-role="content"><!-- content -->
<br>
<a href="Camera.html" data-transition="slideup" data-role="button">Use Camera</a>
<br>
<a href="PlayAudio.html" data-transition="slideup" data-role="button">Play Audio/Video</a>
</div><!-- /content -->
<!-- class="footer-docs" -->
<div data-role="footer" data-theme="a" data-position="fixed">
<h1>Using Multimedia with Phonegap</h1>
</div>
</div><!-- /page -->
</body>
</html>
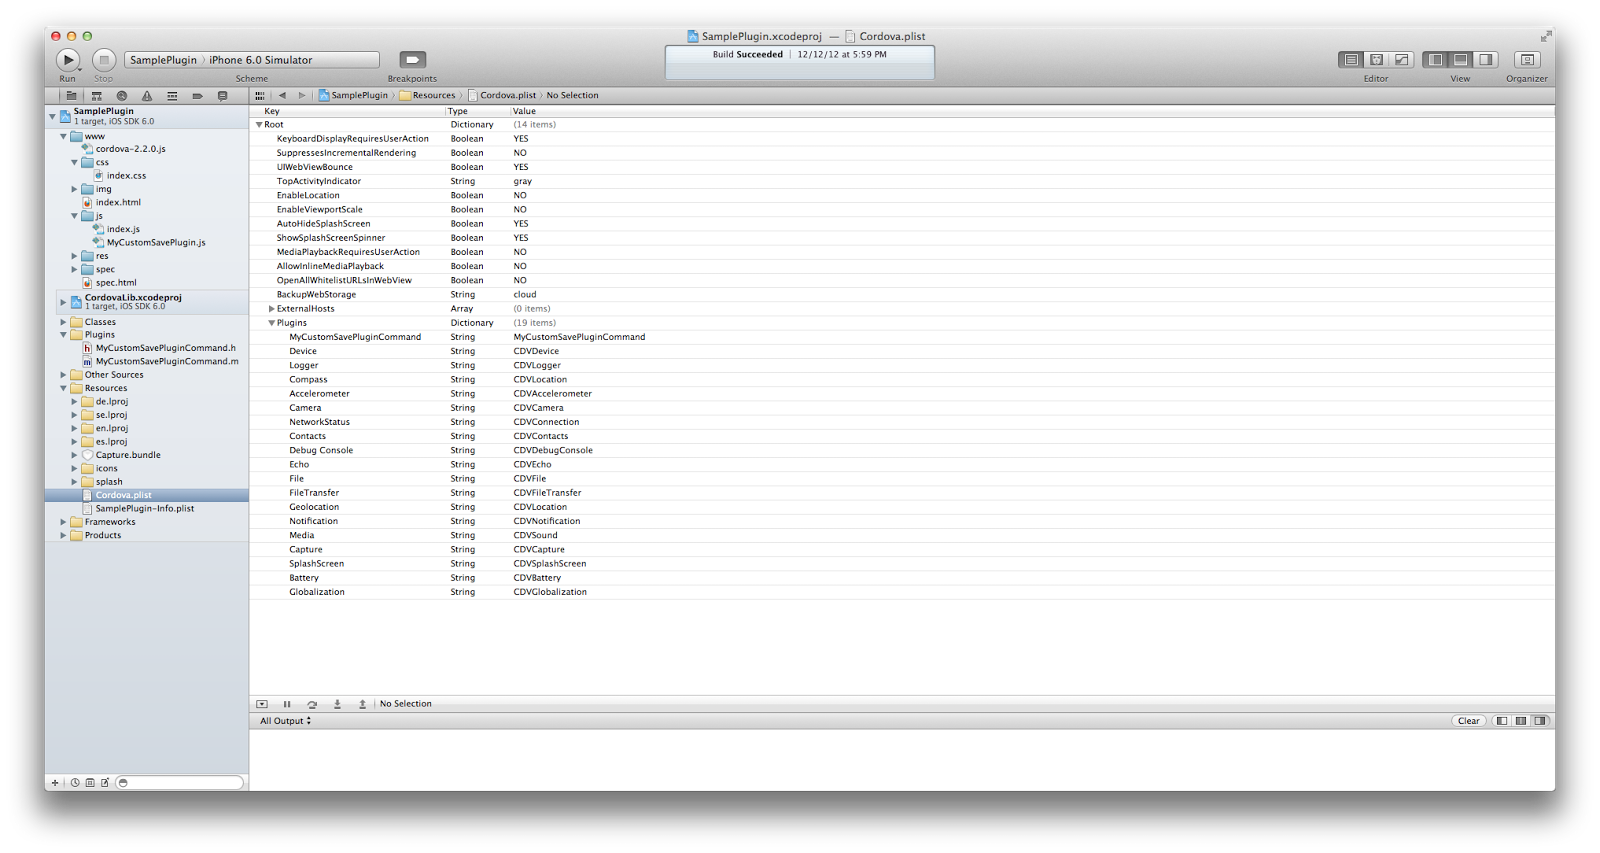
Before proceeding do assure you have added all the assets needed. The app will have the following resources as shown in the following figure :
Now run the app. We can now obtain the desired functionality of camera and play audio and video.
NOTE : This tutorial has been developed by using Phonegap 2.0.0 version. We can use the latest update of Phonegap which is 2.2.0.
Tutorial - building a Phonegap app
PhoneGap is an open-source framework for quickly building cross-platform mobile apps using HTML and JS. It is used for building something called...
Cross platform frameworks for mobile applications
A common question that comes to us from our clients is whether to choose a native SDK development approach or go for a cross-platform framework app...